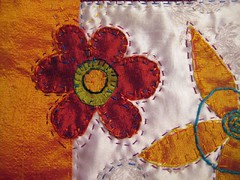
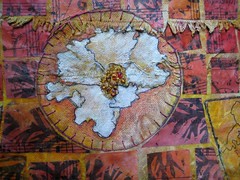
 I'm working madly on my online course that starts this Thursday. It's called Kimono Collage (though you can do any image you'd like) and we'll be creating three pieces of art on three different backgrouds, one cloth, one paper, and one canvas. Go check out the description here, and join me!
 Saturday, February 27, 2010
Online course starts this Thursday!
 I'm working madly on my online course that starts this Thursday. It's called Kimono Collage (though you can do any image you'd like) and we'll be creating three pieces of art on three different backgrouds, one cloth, one paper, and one canvas. Go check out the description here, and join me!
 Friday, February 26, 2010
Sketching and Watercolor: Journal Style. A mini-lesson
the subject
1. Using a pencil, I carefully draw the pumpkin. Drawing is all about really looking. As my eye follows along the edge of the pumpkin, I draw that shape on my paper. I try to look at the object I'm drawing about 80% of the time, and the paper 20% of the time. Go slowing. Sketch lightly. You can always erase. Just draw the basic shapes you see, don't think about what it is or how is 'should' look.
permanent pen over the pencil line
2. Using a black waterproof pen, I trace the pencil lines I've just drawn. Erase the pencil lines.
first stage of watercolor
3. With watercolor (a child's PRANG set works great!), using plenty of water, mix the paint in the top of the palette (or on a white plate). I've started with the color that I see the most of in the pumpkin. A medium yellow orange. Important, leave some of the white of the page. It adds sparkle.
the stem
4. Again, mixing your color in the top of the palette, mix blue and brown to create a greyish brown. (Look carefully at the color of your subject and just play with mixing colors on the palette, until you get the closest one.) Paint the stem, leaving some white, this time portraying the texture of the stem.
a pumpkin
5. I finished by adding darker values (colors) to the pumpkin. the darker shades of orange, and the darker shades of brown in the stem. See what a difference the white of the paper makes?
a border
6. A border or frame for you journal pages really completes the page. In pencil, I doodled a border, partially enclosing the pumpkin and creating a space for text. Then I filled in the doodle with ink, and erased the pencil lines.
a finished journal page.
(5x7" in my Moleskine Watercolor Journal)
7. Fill the space with brilliant, witty words...or just write about your day.
I hope this mini-lesson inspires you to give "Sketching and Watercolor: Journal Style" a try. When I teach workshops, my hope is that my students will fall in love with drawing, just like I have, and will be inspired to keep a sketchbook. For me, it’s the act of drawing and painting that I love so much. Drawing from life helps you become more aware of your surroundings, whether at home or away. Drawing reveals what otherwise may be missed. Sitting still allows you to be more aware the sounds and smells and really see the random detail that makes up life.
Thursday, February 25, 2010
Published!
 I'm very proud to be published in one my fave magazines again Cloth Paper Scissors. (The other fave being Quilting Arts.) This is the March/April issue and Linda Blinn and I have a 6 page article on Cyanotypes starting on page 44-49. Check it out!
Wednesday, February 24, 2010
gelatin monoprints in progress
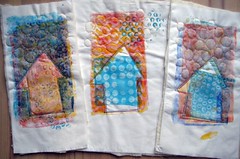 I spent the day yesterday creating gelatin monoprints. I started here, and then read Jen Mason's article in this Cloth Paper Scissors. In my experience, with any kind of print-making you need to make a whole bunch of prints, trying different colors and over printing and playing to come up with a few you like. I printed on both cloth and paper and these three (on cloth) were some of my faves. This photo shows them with batting and a little machine stitching and now I'm hand stitching. I'm liking the way they actual are a series. I'll show you the finished pieces later this week.
in the workshop
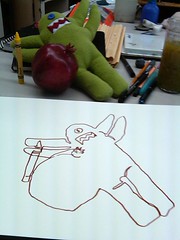 From the weekend workshop.Brenda has us draw continuous line, leaving the space between the shapes open. I'm drawing with a Tombo pen, never had used one before. They're water soluable with two different tips.
in the workshop
 And the finished masterpiece, suitable for framing! The plushy green monster was made by Judy Perez's daughter, and it always makes me smile. Plus the signature pomegranate...
Tuesday, February 23, 2010
more tools
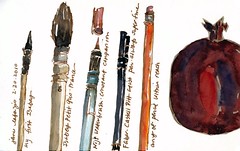 Another page in my Moleskine from the weekend workshop. (The pomegranate was painted on a different piece of paper, and glued on the page.)
 I'm teaching "Sketching and Watercolor: Journal Style" at Art Unraveled August 5. Register now.
Monday, February 22, 2010
And my DVD goes to!
Thanks so much, everyone for your comments on my first ever give-away---A record number of comments here at JaneVille. So many interesting notes and kind words that I've chosen TWO winners, just cuz that's the kind of gal I am.
Remember, you can of course order my DVD, The Small Art Quilt online!
Congrats Lorie Garver and Sharon Chapman
(email me with your mailing adresses)
Remember, you can of course order my DVD, The Small Art Quilt online!
Tools
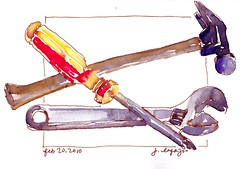 I'm just back from a weekend workshop with Brenda Swenson at the Schroeder Studio Gallery in Orange. I stayed the weekend at an inn down the street and had a thoroughly enjoyable weekend! Plus I was graciously invited by Jamie Fingal, who lives in Orange, to dinner with her and her husband on Saturday night. A wonderful get-away weekend!
What I like about Brenda's workshop is the use of continuous line in our watercolor journal pages. Working quickly, but really looking at the subject, and then painting intuitively, keep a fresh look of the watercolor. All stuff that I try to teach! Alll the paintings/pages done in the workshop, in under 15-20 minutes ~ Perfect for the timing for the traveling artist--as in the workshop I'm doing in Orvieto, Italy this May!)
3 minute bird
Thursday, February 18, 2010
RED!
 I'm working on two things at once..well okay, maybe 8 things at once, but here's one of them in progress. I'm still celebrating Valentines Day, I guess, cuz it's very RED. This is a detail shot, and the piece is 16 x 16." I need to create a 12x12 inch piece for an upcoming San Diego SAQA exhibition, so I'll probably cut this down before I do more hand stitching.
Don't forget my DVD giveaway!
Wednesday, February 17, 2010
working
 Here's the first step on my chinese cloth piece. I tried the needle turned applique (as I imagine it :-) and it was kinda difficult. I think I prefer the raw edge, for it's ease, and mindlessness.
 Thanks everyone for your comments on my DVD give-away! Keep em coming!
Tuesday, February 16, 2010
The Small Art Quilt DVD
 Did you know I have an instructional DVD called The Small Art Quilt? It show three different quilts and how I created them, a torn collage, a painted pet portrait and cut felt design. There's also a gallery section of my quilts. It's quite entertaining...Why am I bringing this up? Because I'm giving one away! This will be my first ever blog give-away, so let's see what happens and maybe I'll give away more stuff. Here's what you need to do. Leave a comment, telling me about your art and what you love to do most. (paint, stitch, collage, computer design or...?) I'll figure out how to use the random generator and pick one person to receive the DVD. I'll blog the winner on Monday Feb 22.
On another note, I'm teaching an online class of paper and cloth collage techniques called "Kimono Collage." It starts March 1.
Chinese cloth and Inidan silk
 I just finished reading Janet Bolton's book "Patchwork Folk Art." And I really read the whole thing. She has a delightful style and an amazing sense of composition. I've started this piece using silk and a bit a trim from an old chinese jacket that I wore for years, and bits of dupioni silk.
framed and ready
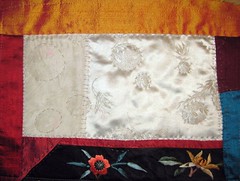 If you've seen Janet Bolton's work at all, you recognize the style of this 'frame.' She actually begins her pieces by creating the frame (I usually do that last, if at all.) The embroidered flower piece is from my old Chinese jacket (that's seen many a party!) and I'm hand stitching with a Jude Hill influence. I have no clue what will happen next...I'll keep you posted.
Saturday, February 13, 2010
Happy Valentines Day!
 I do love hearts. and I love Xs and Os. I made this with my Mundo Lindo kids last week. It's shrinky-dink. All ages love shrinky dink! This heart is about 3 inches tall. Yes, I traced my hand and it shrinks when you bake it. I used colored pencils on the frosted sheets of shrinky dink.
Happy Valentines Day!!!
Houses for Haiti
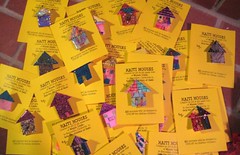 My Mundo Lindo kids made these Haiti Houses. We're selling them for $5 each, with ALL the proceeds going to UNICEF for Haiti. You can do this too!
Friday, February 12, 2010
theatre program
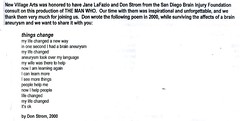 Husb and I went to see The Man Who, last night at New Village Arts Theatre in Carlsbad last night. Imagine our surprise, when we saw this in the printed program.
The play is excellent and fascinating and is based on Oliver Sacks "The Man Who Mistook his Wife for a Hat."
on stage......after the play!

Kristianne, the Executive Artist Director, and director of The Man Who, invited us to particpate in an after the play talk with the audience. I'm the one in the sweater that makes me look like a sofa. The others are the fabulous stars of the play, l to r: Ron Choularton, Manny Fernandes (me and husb) Sandy Ellis-Troy and Walter Murray.
Thursday, February 11, 2010
Tree of Life: Guadalupe

I started my artist career as a watercolor artist. I did this watercolor about (gulp) 8 or 9 years ago. I've done a series of these Tree of Life paintings, all 22x30" on watercolor paper, embellished, collaged and sewn on the paper. The originals are long sold...but I do have some prints (don't ask me. I really need to get it together and put them on etsy) Anyway, you can see the others here and all my Mexican themed work here. There were a couple more, but I didn't get photos. I love doing these, though they take weeks and weeks of work. Point of bringing this up, is that I'm going to teach a 6 hour workshop on this, at the Mingei Museum in Balboa Park (San Diego). I don't know the exact date, but I'll keep you posted.
Wednesday, February 10, 2010
3 colors
 Here are some of the pieces I've been working on. You finally get to see the edges. Those are silk ribbons sticking out from the layers of roving and cloth....
Hey, look at the top of my blog! I've added another page Published! with all the magazine/books I've been in.
Tuesday, February 09, 2010
purple slow cloth
 Woohoo, now I'm on to the purple. Pretty soon I'll photo the whole pieces to show you. They have really cool edges.
And LOOK at the top of my blog.....I have a new page of classes & workshops. I'll be adding more pages---it's a new blogger feature and I'm liking it!
Monday, February 08, 2010
so very Chinese New Year
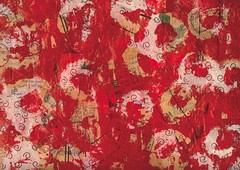
More fun with the vaseline technique from yesterday. Doesn't this shout Gung Hay Fat Choy! Next week is Chinese New Year and begins the year of the Tiger. And I'm a Tiger (and a Libra) so it's gonna be my year! What's your Chinese zodiac sign?
Sunday, February 07, 2010
work in progress- background
 Oh, I do love a new technique! Especially when I already have the materials needed. I'd created this background, from two different paper collages (one yellow, one blue) by cutting the each into squares rearranging, glueing on down on a thin piece of paper, then machine stitching, zig zag and free motion (the circles you see are free motion.) So--this piece was sitting around in my studio, while I read my new cyber friend, Kelli Nina Perkins book called "Stitch Alchemy." She's got tons of great ideas in there, and I'm only part way through the book, when I saw this technique with vaseline! Briefly, you cover part of your art with vaseline, then carefully paint the whole piece with acyrlic paint (I used red and a little white gesso), let dry, and then rub off the paint and vaseline with a paper towel--it ends up looking like peeled paint. I love it! I don't know what will happen to this piece next--it's certainly not finished-- I'll keep you posted.
hey, look at my new JaneVille header! Nifty!
Saturday, February 06, 2010
orange bird and pods
 You saw a sneak peak of this earlier. It's all paper and about 8x8" I created a bunch of this type of collage for a workshop I taught, called cleverly "Collage 101." (The outline of the bird is machine stitched.)
Tuesday, February 02, 2010
dyed sheers
 I dyed these my very own self! And it was incredibly easy. I just wet a variety of sheer fabrics, then spray them with Adirondack Color Wash. Gorgeous huh? I'm using them with my slow stitched pieces.
And, nothing to do with dyed sheers.....I'm teaching an online class through joggles.com, called "Kimono Collage" though you can do any shape you want. We'll be working with both paper and cloth. Hey, so sign up!


