
 |
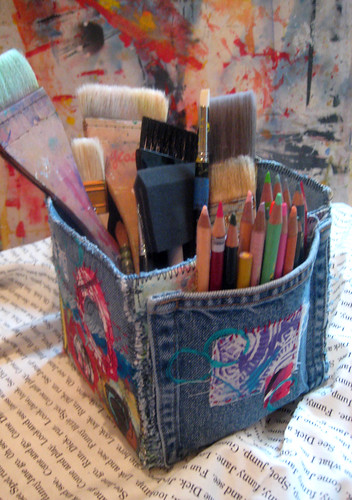
| Studio Box ~ created by Jane LaFazio |
Left over blue jeans and some cloth? create a cool and useful Studio Box.
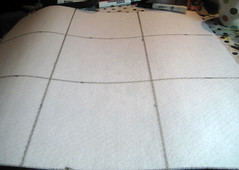
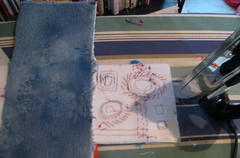
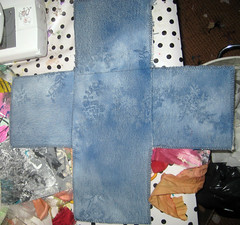
On Peltex or Timtex, I measured a grid of 6 inch squares.
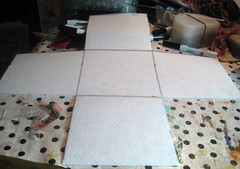
I cut out 4 sides and the bottom, as one piece.
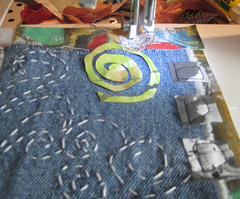
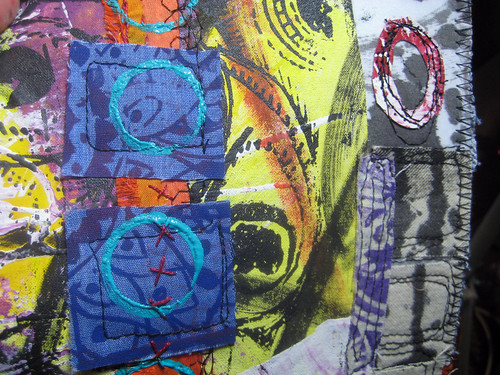
Using some hand painted fabrics and my blue jean scraps, I collaged them to one of the 4 sides. Use a touch of glue stick to hold the smaller pieces in place before sewing. (I worked one side at a time, then the bottom of the box.)
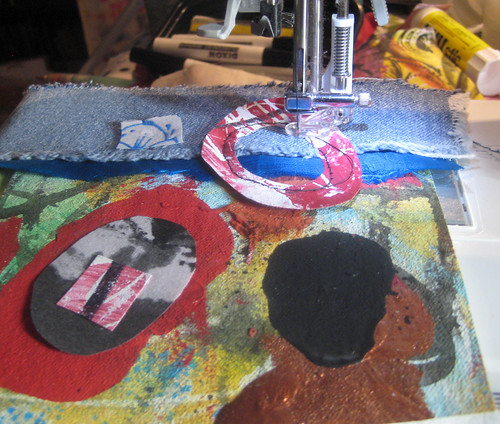
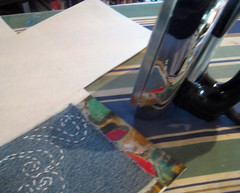
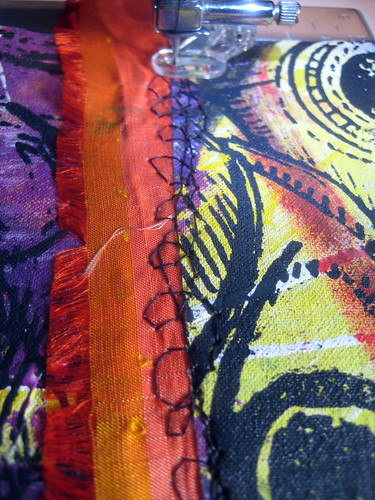
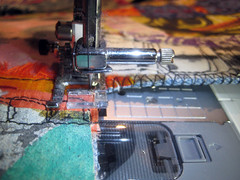
Using black thread, I free-motion machine stitch the pieces down.
The peltex I was using, has a fusible side, so I ironed the larger pieces down, before stitching on them.
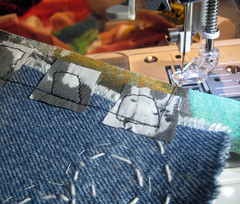
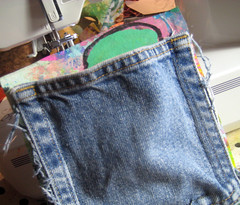
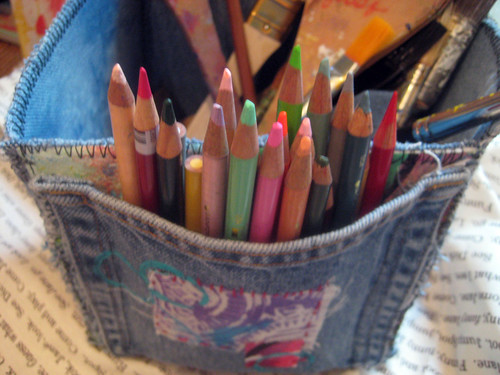
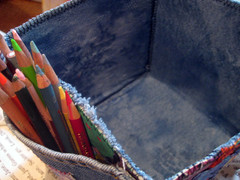
I had a jeans pocket, so I stitched it to one side of my box. I didn't think my machine could go through the french seam thickness, so I sewed just inside the pocket through just two layers of denim, onto a piece of fabric and through to the peltex.
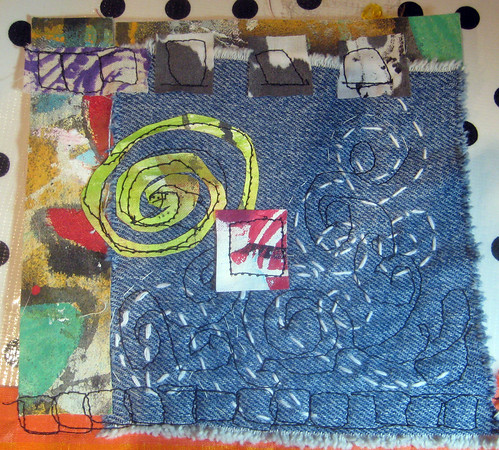
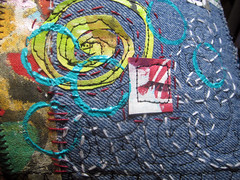
More stitching, hand and machine stitching, working one side at a time.
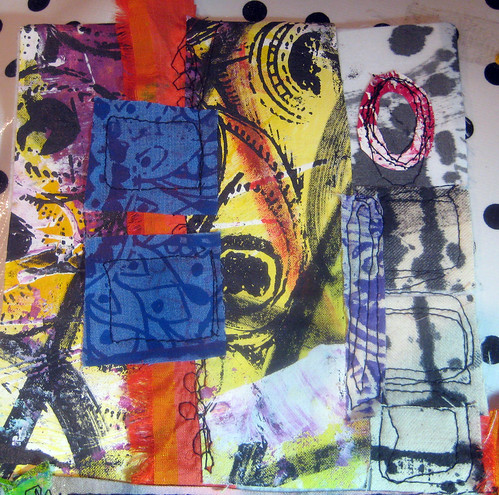
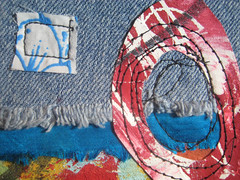
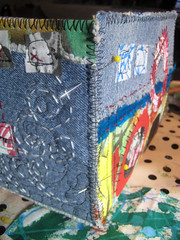
I did some hand stitching, on the 4 sides, before I added the backing. You can add buttons, beads too!
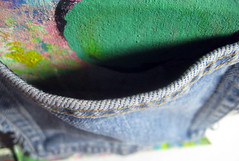
For the lining of the box, I used more denim. (I'd spray painted it, with lace as a stencil, using spray gesso.) I used a fusible webbing to hold down the deninm. You can see my stitching on the right, so the denim interior will cover all that up.
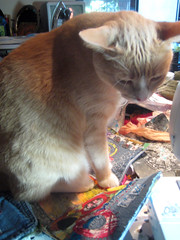
Buddy was quite impressed!
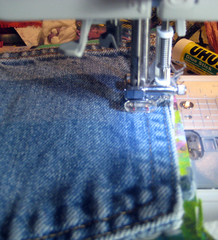
I finished with the box adornments and lining, I zig-zagged all the edges. I only did one pass on the machine, you could do more, or a more dense stitch to make it more perfect.
Since I had two interior seams on the denim, I straight stitched those, to secure them.
 |
| Studio Box ~ created by Jane LaFazio |
 |
| Studio Box ~ created by Jane LaFazio |
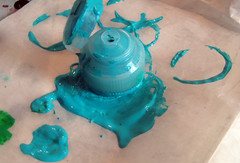
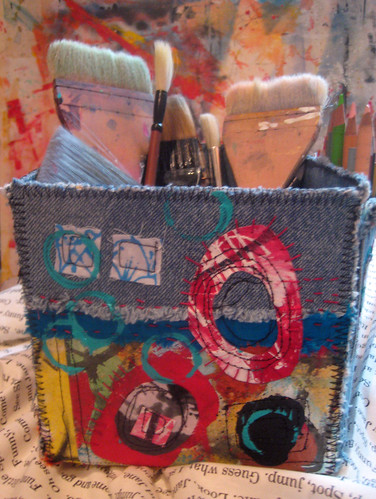
A impulsive, but excellent addition! I stamped some acrylic turquoise circles on all four sides!
 |
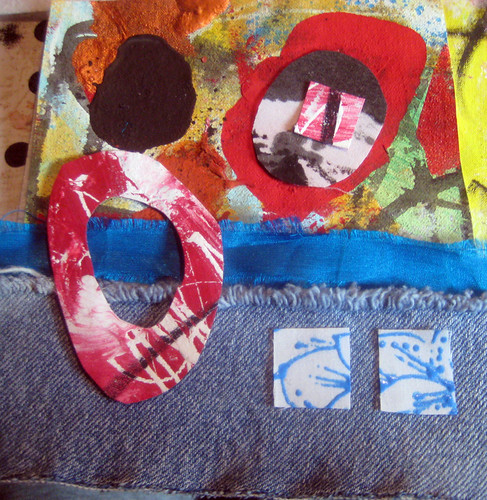
| detail of Studio Box ~ created by Jane LaFazio |
 |
| Studio Box ~ created by Jane LaFazio |
 |
| Studio Box ~ created by Jane LaFazio |
 |
| Studio Box ~ created by Jane LaFazio |
 |
| Studio Box ~ created by Jane LaFazio |
 |
| detail of Studio Box ~ created by Jane LaFazio |
 |
| Studio Box ~ created by Jane LaFazio |
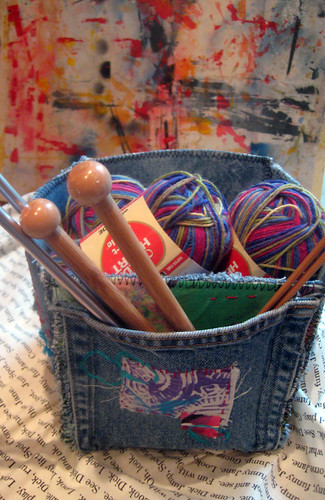
and I could even store my yarn and knitting needles in it. I'd better make some more!
 |
| Studio Box ~ created by Jane LaFazio |
Ok, so much for my plans for today. I HAVE TO MAKE ONE OF THESE BOXES RIGHT NOW! Thanks for sharing!!! I love it, love it, love it!
ReplyDeleteThis is fantastic Jane! I love Alisa's influence and you making it into your own.
ReplyDeleteLove to make a box like this, what is Peltex? Yours is beautiful!!!
ReplyDeleteWhat a BRILLIANT idea! Now why didn't I think of that?
ReplyDeleteJust finishing your Joggles class, so still have painting to do, but I really want to make one of these boxes. What fun! Thanks for the inspiration...again!
ReplyDeleteSue
This is a GREAT idea and the tutorial itself is very thorough. I am going to make myself one this afternoon. Keep these fab tutorials coming; I can't get enough!
ReplyDelete- Kim Young
I wish your tutorials were in a printable format; just a helpful suggestion. I always print them out and take them to my studio. Takes up a lot of color ink though. :-)
ReplyDeleteWhat a great idea
ReplyDeleteThis is wonderful!
ReplyDeleteLove it love it love it!
ReplyDeleteI think it might be the perfect gift idea for my knitting daughter!
I love the idea. I think I'll make some for gifts. Thanks!
ReplyDeleteGreat idea and great tutorial! Thanks for the inspiration.
ReplyDeleteVery fun!
ReplyDeleteI think you are becoming the queen of the quick and easy-to-follow tutorial! This is nice.
ReplyDeleteLOVE LOVE LOVE THIS Jane... You GO GIRL!
ReplyDeleteAWESOME! I can't get enough fabric boxes...they are so whimsical. Love your new header too Jane. It's scrumptious!
ReplyDeleteExcellent project. Thanks for sharing!!!
ReplyDeleteI love denim, recycling, texture, hand embellishing and this idea! Very clever, Jane. Just finished your online sketching/water colour class. Loved that, too.
ReplyDeleteAbsolutely too cute and such a neat idea. Great thing to do with old jeans...holes would even add more character and who doesn't have some holey jeans. Drop a couple empty soup or vegie cans inside and the pencils or brushes can be easily organized and still look snazzy.
ReplyDeleteThanks for sharing, Jan
great use of old jeans...and I have sooo many that no longer fit! Linda W
ReplyDeletefabulous....i need to do this one... ;-)
ReplyDeleteTrès beau challenge... Belle réussite commune. J'ai eu beaucoup de plaisir à découvrir votre blog grâce à votre amie Alisa.
ReplyDeleteJe reviendrai vous voir, bises.
Came to visit via Alisa's blog. Your denim art box is fabulous! Very clever art piece. Holly Jolly creating...
ReplyDeleteI came to visit you by Alisa's blog.
ReplyDeleteImmediattely became a follower . What a great box .I love it .Thanks for charing this with us!
Greetings Miek
Such a wonderful project! BRAVISSIMA!
ReplyDeleteWow, I just love this. The pocket was a real stroke of genius! Thanks for the inspiration (as always!)
ReplyDeleteHow awesome is that!! I am so inspired by your work. Thanks for the detailed post. I will try out one for myself. AWESOME!!
ReplyDeleteSusan (from Germany)
WOW. This is the coolest project EVER. I have a whole drawer of scraps and now I know just what to do with them...decorate my denim studio box!! Perfect Christmas present project too!
ReplyDeleteHopped over here from Alisa's blog and am I ever glad. LOVE your studio box and I am now following your blog too. Happy Holidays.
ReplyDeleteReally neat! Love your header, Jane.
ReplyDeleteYou're always up to something! When do you sleep?
ReplyDeleteWhat a fabulous idea, and I love the impulsive turquoise paint! I need to make me some of these, thanks so much for the tute :)
ReplyDeleteLove this! I will be making one of my own. Thank you for the inspiration!
ReplyDeleteI LOVE this! I will have to make one. I might have thrown out some old jean material! Oh, no...gotta go dig it out of the trash! Thanks for the tut! I'm inspired.
ReplyDeleteI absolutely LOVE this project!! Gotta try to do it soon!
ReplyDeleteThis project has been on my todo list for quite a while. Thanks for reminding me and yours is absolutely beautiful!
ReplyDeleteNow this is a project every artist has a use for...how absolutely fabulous! Thanks bunches for sharing.
ReplyDeleteHugs,
Beth P
I need to make a bunch of this, thank you! ;D
ReplyDeleteI love this idea. Thanks for the inspiration. I need more old jeans (need more pockets)!!! I just 'up-cycled' a pair into a 'Journal on the Go' cover so I could easily carry my journal, pens, markers, etc.
ReplyDeletehttp://lindakittmer.blogspot.com/2012/02/diy-home-made-washi-tape.html
Jeans should be made with more than just 2 pockets! I know I can make more, but I like the look of the manufactured ones.
What a wonderful idea!
ReplyDeleteThanks for sharing.... Judith
Awesome awesome upcycle! Perfect spot for paintbrushes! You should totally enter this project in Craftbaby's 'Upcycle Challenge'! http://www.craftbaby.com/contests/3/upcycle-it-sweeps
ReplyDeleteFantastic coloured project! I'll follow you from now (a friend suggest me your site). Nice to meet you from Italy. Vale
ReplyDeleteThis is just awesome. Back in the 70s we use to embroider all over our jeans. This reminds me of my most beloved pair of jeans I ever owned. Definitely going to make one of these. Thanks for the memory and thanks for sharing. I'll be linking to it on WeeFolkArt.com's Facebook page :)
ReplyDeleteThanks for making something so do-able, I could make one right now! Even have some Peltex. Really lovely project. :)
ReplyDeleteJust so clever I would luv to have ago thanks for sharing your lovely talents :O)
ReplyDeleteHow cool! I wouldn't splash paint on yours because it is FABulous. Mine may be a little more splash-able, once I finish it. Will make a great gift as well! I found you on Welcome Wednesday linky party.
ReplyDeleteBiggSis http://mysisterspantry.wordpress.com
what a great idea. I need something like that now that I'm learning to paint. I don't have anything other than a paper bag to tote my things in -- this will be much better.
ReplyDeleteHi, great tutorial:-)
ReplyDeleteA big hug from Italy, Emanuela
Awesome tutorial!! definitely have to make some of these--i think they will make great gifts for artsy friends too!! Thank you for sharing!!
ReplyDeletelovely idea, I will have to give it a try, I always need more little storage boxes!
ReplyDeleteWhat a fabulous piece! I love all the details and colors. It is just perfect, I will have to see if I get around to making one.
ReplyDeleteI usually paint funky furniture,
( www.carolynsfunkyfurniture.blogspot.com)so this was soooo attractive to me. Great job! It makes me want to sew!
Thank You So Very Much For Sharing. Could The Squares Be 8" Or Would It Become To Unsturdy.
ReplyDeleteMagnifique, l'idée, le tuto, tout!
ReplyDeletec'est vraiment adorable et sympa , je decouvre ton blog , il est coooool, si cela te tente de passer chez moi , je fais un jeu , et cela peut aussi interresser , tes abonnées, je me suis inscrite a ton blog, je ne fais pas du tout la meme chose
ReplyDeletebisous , bon a- midi,
frifricreations.
What a cute and practical idea. I hope to make a couple
ReplyDeleteLove the color poping project and the cat too :)
ReplyDelete