

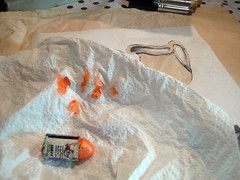
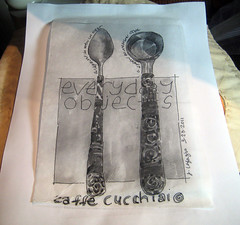
I love cutting my own stencils from freezer paper. And why not carry on with my recent theme of my sketchbook pages of everyday objects. I started this as a background, or sampler, to show you how it's done.
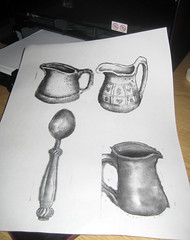
I printed out my sketchbook images on to freezer paper (I used my laser printer and printed in b&w, but it doesn't make any difference. Inkjet is fine.)
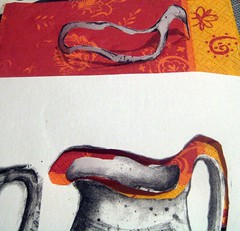
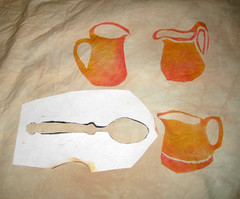
Using an x-acto knife, I cut away the part that would be filled with color. (I've laid the stencil on a colored paper, so you can see the part I've cut away.)
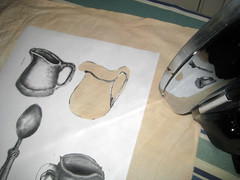
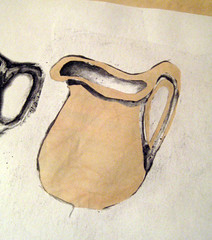
Iron the freezer paper to fabric. (I'm using my tea-stained cotton). Notice how I added the cut out pieces of freezer paper to get the interior and handle.
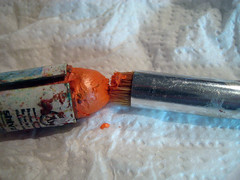
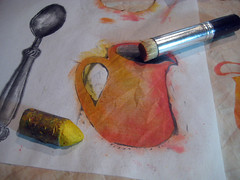
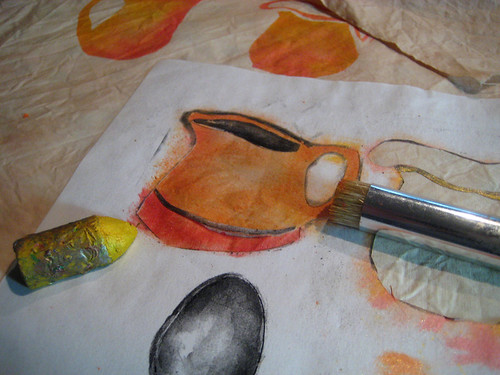
I'm using Shiva Paintstiks (oil paint in a crayon form). I prefer the
iridescent colors. You clean off the tip, to remove the skin that has formed, and then use a stencil brush.
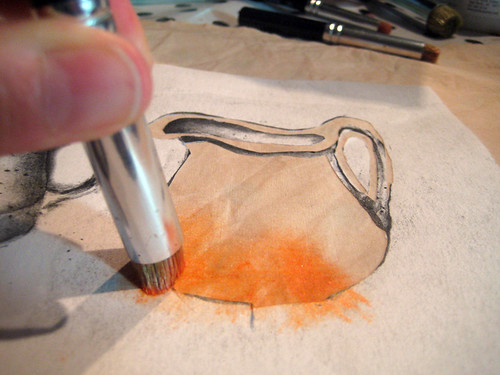
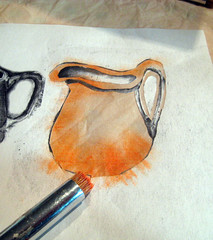
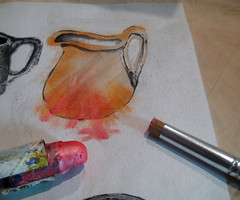
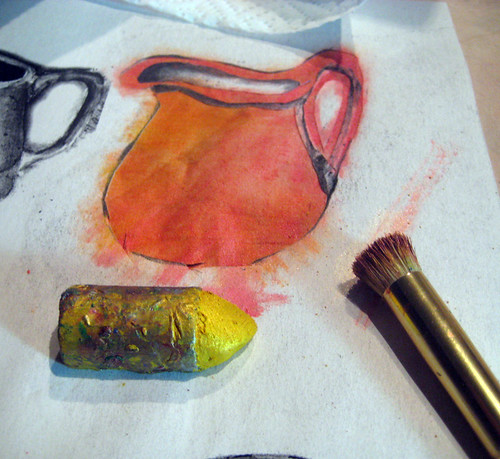
The key to this is blending different colors.
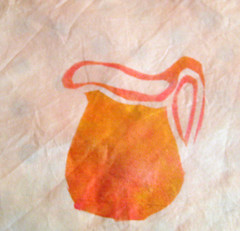
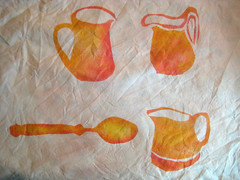
Remove the freezer paper.
I'm using these images as a background, so on to the next. Cut out with an Xacto knife, iron on the freezer paper, careful not to touch the previous 'wet' image. Add color with a stencil brush.
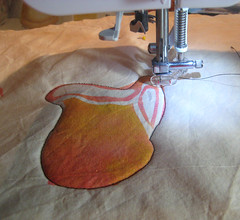
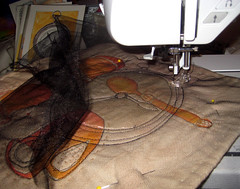
(Note: let paintstiks dry overnight, and iron/heat set.) I added batting to the back of the fabric, and began a little machine free motion stitching in black thread to mimic the drawn pen line from my sketchbooks.
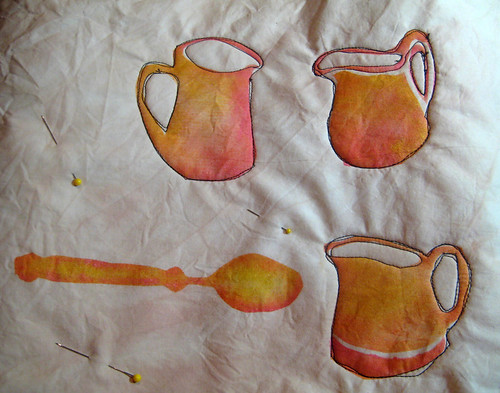
I stitched around the spoon, and thought, okay, what next? A focal point of some kind would be nice.
Warning, this is where you may be come confused. It's not you.
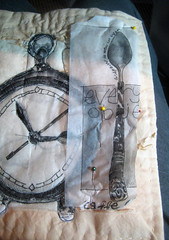
I finished off the edges of the little quilt, and did a little hand sewing, thinking about what would come next. I decided on the clock image. Printed it out on deli wrap, pinned it on the back, and stitched from the back. (here's my short tutorial on this process) THEN, I added two layers of black tulle to the front, and stitched around the clock again from the front.
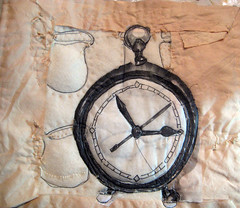
Clock on the back of the quilt.
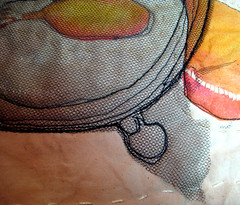
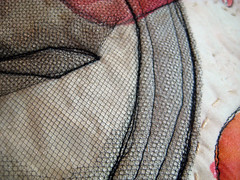
I cut away the tulle, around the clock silhouette, and cut away one layer of tulle from the interior of the clock.
It still needed more, so I printed out my spoons and used one for the image. Pinning the image on the back and sewing from the back.
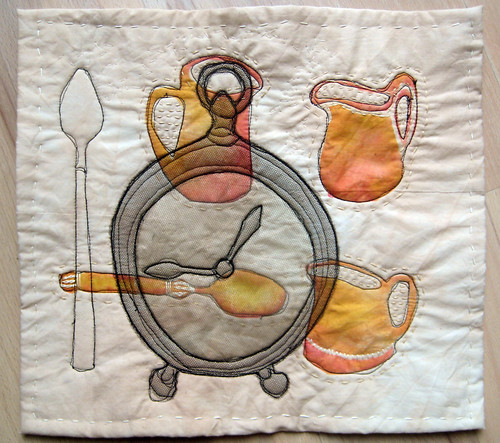 .
. So, here it is. It's not done, it still needs something. I'm thinking I'll add some text from an old book..I'll let you know.
Check out my teaching schedule here.
Thanks, Jane--great instructions! I love the whole composition, especially the addition of the watch from the back--the black tulle ties everything together. Can't wait to see your finishing touches. Are these techniques also to be found on your new DVD?
ReplyDeleteVery cool, Jane! I am incapable of quilting and fabric work, but the first part, the stenciling itself, sounds great to me. I appreciate how you use your own sketches as a basis for the stencils. Very clear and easy to follow!
ReplyDeletethanx for the tutorial. love the everyday theme. does the oil stix color eventually dry? have you ever tried craypas? (thinking of stencils with kids. I have used craypas with small makeup sponge to smudge colors on paper, but never tried with fabric)
ReplyDeleteGREAT TOOT! Thanks!
ReplyDeleteGreat tutorial! This has given me some great ideas. I LOVE freezer paper. Such a versatile tool! Thank you, thank you!
ReplyDeleteI used craypas as a kid and loved them! Yes, the paintstiks dry and are permanent. They can also be used on paper. You could certainly use paint, with these stencils, and daub it on with a small sponge.
ReplyDeleteI really like how you did this with your own sketches. I tend to just let my sketches sit in the book and only use them as a reference for something else. You've given me so good ideas. Thanks!
ReplyDeleteConnie Hudson
Thanks for the wonderful tute! I thought it was clear and followed you just fine. Love the working from the back and the organza layering on top of the fabulous stenciling!
ReplyDeleteGreat tutorial. I like the end product and think the only thing missing is color for the border. Thanks for sharing this.
ReplyDeletewow this looks fabulous. I've never tried any of these techniques or worked with freezer paper but I love it everytime I see something like this. Wonderful work and thanks for the tutorial!
ReplyDeleteThanks so much for this tutorial! I love the layered effect that you did with the clock. The old lettering might be nice.
ReplyDeleteThis is beautifully put together Jane! The size is especially pleasing. Your blog ROCKS!!
ReplyDeletePamela Underwood
Wow! Love your piece!
ReplyDeleteWow, this was wonderful!
ReplyDeleteThank you for sharing the whole process on your stencil art, love it! :]
Wow, this really allows us blog readers to follow your creative thinking as you go. Great combination of techniques too.Thanks.
ReplyDeleteWhere do you get your freezer paper? I haven't been able to find it recently.
ReplyDelete@anonymous, there's a link in the blog post to freezer paper, just click on it
ReplyDeleteWow! SO cool! It's such an original idea with which to personalise a quilt!
ReplyDelete