 |
| 1. First I gather my materials, by color. Starting with the kit from Suzanne Morgan (Refer back to the piece I made last week, and follow along with my article from Quilting Arts, seen here.) |
 |
| 2. From my own stash: Recycled Sari Ribbon |
 |
| 3. Iron the ribbon flat |
 |
| 4. Sheers from my stash. Some dyed and some plain |
 |
| 5. Wool roving and knitting rejects and some silk roving (only because I already have it.) |
 |
| 6. Lay out the pre-felt piece |
 |
| 7. I begin building the layers by laying out a thin layer of roving, all in one direction. |
8. Using your needle felting machine, 'sew' down the center of the piece to begin anchoring the roving.
|
 |
| 9. Anchor roving by needle felting a few rows |
 |
| 10. Begin adding layers of texture like ribbons and bits of knitting. I like the ribbons to run off the edge, you can always trim them later. |
 |
11. After your roving textured pieces are down and lightly secured, begin adding strips of sheers, like organza, tulle, cheesecloth to cover the whole surface.
|
 |
| 12.Once the whole surface is covered with strips/pieces of sheer, needle-felt the whole piece securely. I go over the whole surface to compress the layers. |
 |
13. Here's a view from the back. I also needle felt from the back, which will bring up the backing color to the front.
|
| 14. Here's a close up of the front, you can see how compressed it is. |
 |
| 15. Because I like to work small, I cut the piece in half and now I have a series! :-) |
 |
| 16. At this stage, I'll add any additional color or shape to balance the composition. |
 |
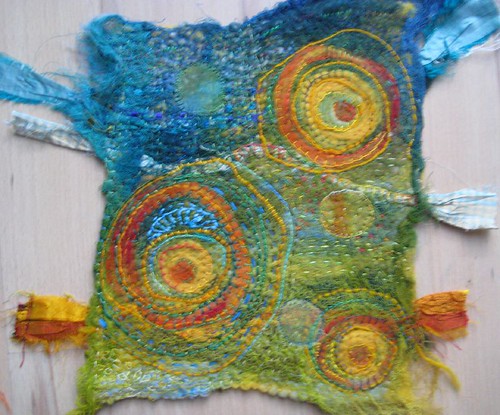
| 17. Once you're happy with your background, you can add shapes (I like circles) using roving, yarn and ribbon. |
 |
| In progress ~ machine needle felting by Jane LaFazio |
 |
| In progress ~ machine needle felting by Jane LaFazio |
 |
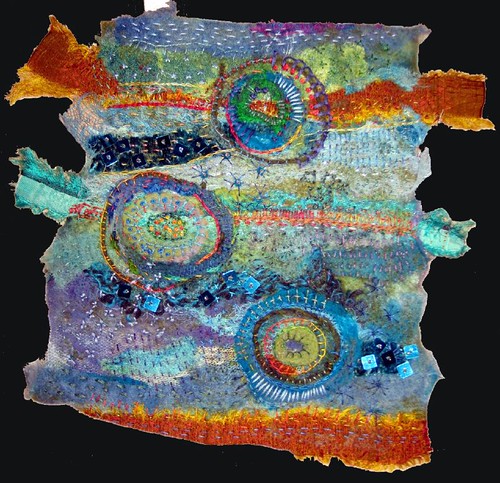
| Machine Needle Felted "Rainbow Series: Turquoise and Gold" by Jane LaFazio |
 |
| "Evidence of Fossils" by Jane LaFazio |
 |
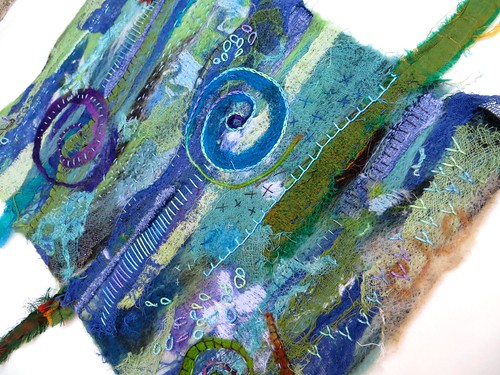
| "Rainbow Series: Green and Blue" by Jane LaFazio |
 |
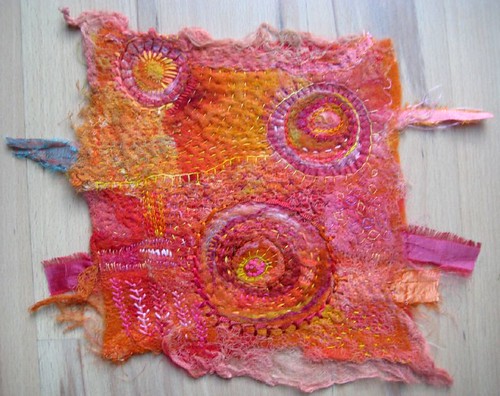
| "Rainbow Series: Pink and Yellow" by Jane LaFazio |


Wonderful Jane! Today I will receive the kit from Suzanne Morgan and will start working on it. Thanks a lot!
ReplyDeleteGO JANE.. GO JANE... Felt away.. Felt away!
ReplyDeleteLove this step by step! I'll be checking back to see the finished piece.
ReplyDeleteI dont have an embellishment machine
ReplyDeletebut I do like to felt by hand, will all the other embellishments felt by hand? I have used old chiffon scarves, which worked.
oh so gorgeous! thank you!
ReplyDeleteOh my goodness. This i is so beautiful. I will try this with no-machine method this summer, my sewing group will love it!
ReplyDeletegorgeous! A no machine method? Hmmmm...
ReplyDeletebeautiful work and great tutorial!! Now what if you don't have a felting machine?? can this be done by hand?? (I know it would be a lot of work!!) or is best to use a machine?? can you use your regular machine to at least tack the initial pieces down like in your 1st step and then do by hand?? would love to know how to proceed thanks so much! what a great blog too!!
ReplyDeleteHugs Linda
Wonderful tutorial.
ReplyDeleteThanks.
LG,
Helga
Gorgeous, Jane! You make me want to go out and get a needle felting machine!
ReplyDeletei recently bought a machine
ReplyDeletethis tute will help
moire please
Hey you all without an Embellisher (AKA needlefelting machine) I don't know if you can do this by hand cuz I've never tried. I'm sure you could do a smaller version--in fact, why don't you try it and then post the tutorial on your blog--then I'll link to it. Keep me posted!
ReplyDeleteDon't have an Embellisher machine, but I will try it with the 3-needle felting tool that I felted a hat, will see how it goes!
ReplyDeleteThank you so much Jane! I love the transformation from raw materials to gorgeous completed work.
ReplyDeleteLove it AND I just got my own babylock embellisher machine, just waiting for it to arrive. Keep it up!
ReplyDeleteA nice tutorial and yes, this could be done by hand. I do have one comment though--If your machine does not have a guard (I can't be quite sure from the picture) be very careful to keep your fingers out of the way!
ReplyDeleteIf you hurry you can still get in on the "whisper felting:" class at http://QuiltUniversity.com
Thank you for the great tutorial! It makes me want to try this out too! I have no embellisher either but a Bernina sewing machine and know that one can buy a needlefelting equipment for it. Do you know if it works as good as an embellisher or not? The "prefelt piece you use as a base for this work is it a special piece of felt?
ReplyDeletethis makes me want a needle felting machine!
ReplyDeleteSisa: Prefelt is just a convenience, really. Do take care what you use on the back, so that you can needlefelt from the back and have that color come up.
ReplyDeleteAnd I've heard about the attachments, but not from anyone who has used one.
It really is beautiful, your art, and the tutorial is helpfull though you don't say how long it takes, it must take for ever even with the sewing machine as a felter? Can you buy that needle for any machine? I would love to try this out!
ReplyDeleteYOU ARE A DOLL!!!!!! THere is nothing like seeing things stepped out to make something really make sense, no matter how good your text explanations may be!!! Fabulous tutorial Jane- thank you so very much.. Now that things have calmed down after eldest's HS graduation, I hope to find some time to visit all of the gals and see all of their wonderful tutorials. Artists are such incredibly generous people- now I only hope that one day I can be lucky enought to take a class from you In person!!!!
ReplyDeleteJane, I am a recycled fiber & felting artist. Recently I purchased an embellisher Janome & have not been impressed with it until I saw your work! Such inspiration & can't wait to play with it! Thank you. Thank you. Thank you. Did I say thank you. Great work. Can't wait to see what you do next!
ReplyDeletethanks!
ReplyDeleteThis is really awesome! I bought my embellisher several months ago and haven't used it. Now I'm itching to try it. Thanks so much for a great tutorial!
ReplyDeleteI am SO CLOSE to buying myself a needle felting machine. I am considering the Singer ER10. Have you heard anything positive or negative about it?
ReplyDeleteYour work is so beautiful! Thank you for the inspiration!
Beautiful work! Thank you for the inspiration. I'm thinking of trying this with paper & fabric with no use of a sewing machine. Wish me luck... I am hoping for a good turn out on this idea/project.
ReplyDeleteGorgeous work; right now I'm too overwhelmed with fabric art basics to try anything like this, but I enjoyed watching your process.
ReplyDeleteIt was fun to watch the piece come to life. Like soup, you need some basics and then use what you have,...and a felting tool/machine (the soup pot). Beautiful.
ReplyDeleteI have just bought a pfaff 350p machine, it arrives tomorrow , can't wait to get started, thanks for your inspiration..
ReplyDeleteThank you, just got an embellisher. So excited to try this.
ReplyDeleteWow thank you Jane, is inspiring and beautiful. x
ReplyDeleteWhat brand machine do you use? Is there one better than another?
ReplyDeleteWhat type of machine do you use? Is one better than another?
ReplyDeleteI use a BabyLock Embellisher....and I've had it for years.
DeleteI love the textures and color! I too love to work circles and swirls in to my designs. Thank you for sharing your process!
ReplyDelete